How to Install Moroccan Limestone Tiles
IMPORTANT
Limestone tiles are a natural material showing nuances in texture and color. Individual limestone tiles will not be identical, and may differ slightly throughout boxes, and even within the same box. This is a result of the nature of natural stone. Mixing tiles from different boxes during setting may be necessary to produce a beautiful naturally rich appearance. Expect variations of color and texture in any batch of tiles. Variations in color tone are not valid for claims or refunds.
Download our printable Moroccan Limestone Installation Instructions (PDF).
PRECAUTIONS
- Limestone tiles are very absorbent. Tiles can be easily stained until they are appropriately sealed. Avoid walking on the unsealed tiles or handling with dirty hands.
- Tiles must be clean and dry before each coat of sealant. Moisture in the tile can be trapped by the sealant, and may cause discoloration later.
- Always test products on a single tile before applying to the entire floor.
- Avoid dark, heavily pigmented, or contrasting grout colors, such as black with light color stone tiles, or white with darker stone tiles. Using new (or new to you) sealants, grouts, or methods should be tested first, as grout haze can be very difficult to remove later.
- Do not make any unnecessary pencil marks on the face of limestone tiles as they may be difficult to remove later.
- Limestone tiles, as with all building materials, are subject to contraction and expansion depending on climate. Use an uncoupling membrane or a similar product and consider using expansion joints in larger runs to prevent cracks in your stone tile. Ensure that the products you are using provide adequate support for the tile.
- Limestone tiles must be stored indoors until time of installation. Storing outdoors or in a covered shed may result in tiles becoming stained or discolored by damp packaging. Villa Lagoon Tile shall not be responsible for issues caused by inappropriate storage after delivery.
- All limestone tiles must be examined by buyer before installation. Villa Lagoon Tile shall not be responsible or liable for any complaint or claim after the installation.
- All limestone tiles are very porous and MUST be sealed. Unsealed limestone tiles will be prone to staining and moisture movement.
STEP 1. PREPARATION
Setting our limestone tile is not difficult. Preparation is a key component to success. Remember these tiles are porous and can be stained by dirt, thinset, chalk, pencil marks and greasy hands. Try to plan your installation so it is the last major step of your project, to prevent other trades from needing to traffic or work over the new installation.
STEP 1.1 Inspecting and Preparing Tile
Make sure to inspect your tile upon its arrival. Take photos of the delivered freight, and note any damage on the driver's documents before you sign for it. Store the tiles inside, in a clean, dry place. On installation day, make sure to set up multiple boxes, so that tiles can be examined, cleaned, and set in a rotation. This helps disperse slightly lighter or darker tiles harmoniously through the installation.
Make sure you or your tile setter understands the layout. Many shapes must be rotated in different ways as they are set, to complete the pattern. Some designers use alternating color stones to create checkerboard or other patterns.
STEP 1.2 Selecting Sealant
All limestone tiles must be sealed during installation. Make sure to understand and have available the appropriate sealant for your application. We recommend Fila FOB, an Italian product designed for honed marble, limestone, and travertine. Our internal testing has found it to have excellent performance.
STEP 1.3 Substrate Preparation
Make sure you have a surface appropriate for tile installation. The surface should be a cement slab, cement backer board, uncoupling membrane, or other product meant to take a tile installation with thinset. The surface should be clean, level, and stable. Any rigid tile or stone installed on a surface that flexes will develop cracks. Make sure that your installation is water-tight. Moisture entering behind the limestone tile can carry salts which are deposited as stains on the surface when it evaporates. This is called "efflorescence". Tiles should not be adhered directly to plywood subflooring, drywall, or painted surfaces.
For fresh concrete slabs, make sure the slab is sufficiently cured. This may take at least 4 weeks under normal conditions. As concrete cures, it shrinks and releases moisture. Shrinkage can cause mechanical stress to the stone tile installation, and moisture release can cause efflorescence. For larger installations, consult your engineer about the need for expansion joints and uncoupling membranes.
If you have transitions to other materials, plan them accordingly. Particularly, ensure that the edge of the limestone tile installation is water-tight, such as when transitioning to very different materials such as carpet.
Step 1.4 Selecting Adhesive and Grout
Tile adhesive should be regular or modified thinset. Thinset can sometimes leach through limestone tiles, so be careful in your selection, that it will be harmonious with the limestone tiles you are setting, if the leaching occurs. For instance, don't use dark gray thinset with light gray or beige limestone.
Grout should be a regular, unsanded grout, of neutral color. Epoxy grouts can be more difficult to clean, causing grout haze. We recommend MAPEI Flexcolor CQ grout, as our internal testing has found it to provide superior cleanup versus other products tested.
High-contrast grouts (such as black grout with light-color limestone tiles, or white grout with dark tiles) are not recommended, as they can increase the likelihood and noticeability of grout haze. Do so at your own risk, by testing first, and using extreme care.
Many manufacturers will have slightly different mixtures for different situations. Make sure that the products you choose are suitable for limestone, and for the substrate, surface, and grout width you are using.
Step 1.5 Miscellaneous Supplies and Equipment Needed
- Marking and Measuring
- Level
- 6-8 Foot Straight Edge
- Tape Measure
- Carpenter's Square
- Pencil
- Chalk Line
- A Quarter (or other large coin)
- Tile Wet Saw
- Diamond Blade
- Saws can be rented from many hardware stores.
- Read Directions, and Use Appropriate PPE.
- Prep Tools
- Sponges
- Clean Rags
- Buckets (for water and for mixing)
- Drill and Mixing Paddle Attachment
- Wet/Dry Shop Vacuum
- Mixing Bucket Dust Collector (WaleTale, Dust Hog, etc)
- Tile Setting Tools
- Grout Float / Rubber Trowel
- Notched 1/2" Hand Trowel
- Tile Spacers
- Personal Protective Equipment (PPE)
- Goggles / Safety Glasses
- N95 Respirator, or Better
- Sealant Tools
- See Instructions for Each Sealant Type
STEP 2. SETTING THE STONE TILES
Step 2.1 Layout Lines
In most situations you're going to want the installation centered in the room, so that the rows of tiles along the walls are the same width on opposite walls. Starting with the longest walls, find the center point with your tape measure, and mark it on the floor. Do the same on the opposite wall, and use your chalk line to snape a line between the two points. Then repeat the process on the other two walls, and you should have two lines that intersect at the center point of the room. Check that the lines are perpendicular with your carpenter's square.
Step 2.2 Dry Layout
Now you will likely want to check your layout dry. Without using adhesive or grout, start at the center, and lay the limestone tiles out to the wall, using tile spacers. You can now see how much space is left at the wall. If the space is less than half the width of a tile, you may want to shift the whole section by a half tile, essentially centering the first tile over the center line, rather than starting at the edge. This may not be desired for some layouts. Repeat the process in the other direction. You will have an "L" of tile from the center, outlining one quadrant of the floor. Double-check that this will give the layout you desire. You may want to measure and snap new chalk lines, if you choose to shift the layout by a half-tile. It's also a good idea to double-check measurements and squareness before moving on.
Step 2.3 Preparing Thinset
Using a modified thinset or unmodified thinset, read the directions from the thinset manufacturer. Make sure that the product is intended for the substrate and tile being used. You will be mixing what is essentially a bag of cement with water. Mixing is typically performed in a 5 gallon bucket, using a mixing paddle attachment with a corded power drill. Make sure to follow the directions for the ratio of water and mixing method. Make sure to use a respirator, and even better, a mixing bucket dust collector. These attach to your shop vacuum to help keep the aerosolized powder from drifting around the room. This airborne silica dust is dangerous with repeat exposure, and can cause cancer or lung disease.
Step 2.4 Apply Mortar, and Set Tiles
Work in small sections, 2-3 square feet at a time. To prepare the surface, first "burn in" the thinset by taking a small amount, and pushing it into the surface with the flat side of the trowel. The whole section should be "wet" with a thin smear of thinset. Apply more thinset, and use the notched side of the trowel to comb ridges of thinset. Make sure the ridges are fully formed without gaps and voids. Keep all of the ridges straight, and do not use swirls, or cross the ridges, as this can trap air. This practice is designed to allow the ridges to collapse evenly, and allow all of the air to push out from beneath the tile. Limestone tiles require 95% coverage, for an effective installation.
You will want to "back butter" the limestone tile by putting enough thinset on the back to press-in a smooth, level layer. Our limestone tiles have a sticker on the back, to help identify the back versus the face. If it is missing, inspect both sides, to insure that you're installing the tile with the face out.
Press the back-buttered limestone tile into place, using only hand pressure. Tile spacers can do a great job keeping your spacing even, and many are designed to help keep tiles level. If not using spacers, you can use a quarter or similar coin, and slide back and forth from one tile to another to find "lippage". Make adjustments ONLY with consistent hand-pressure. Never use a mallet or other tools that might crack or shatter the limestone tiles. Even if it does not cause any immediately noticeable damage, the stress can lead to tiny surface cracking later. Try to avoid getting any thinset on the surface of the tile. If you do, clean it immediately, and do not allow it to set in. Limestone tiles stain easily.
Step 2.5 Allow to Cure
Allow sufficient time for the thinset to cure and dry. Typically at least 24 to 48 hours. For best results, test that the installation is dry using a moisture meter. If unsure, try taping down a square of plastic film using painter's tape (other tapes may dirty the tile with adhesive). Allow to sit for several hours or overnight, and look for condensation on the underside of the film.
If you are installing a sub-floor heating system: do not under any circumstance allow the system to be powered on until the installation is cured and dry. Many sub-contractors may want to test their system as soon as the tile is set, so they can move on to the next job. Testing a sub-floor heating system beneath a wet installation can permanently damage your flooring. Powering "on" a sub-floor heating system (even for a brief test) while the tile is still damp can permanently damage your installation.
Protect the tile during this period at all times from other trades, foot traffic, and pets. The tile must be clean and dry before proceeding. Do not use acids or vinegars to clean limestone tile (for instance anything "lemon" or "citrus" is likely to be acidic). Acids may dissolve the calcite minerals in the natural stone, causing etching and discoloration. Protective products such as Ram Board® should be used if there will be a need for traffic during this time.
STEP 3. FIRST SEALING
Before grouting, the installation will need to be sealed. Limestone tiles are very porous, so grout can easily be pushed into the pores, or left to cure too long on the surface, and stain the tile. This first sealing helps serve as a grout release.
A good penetrating or impregnating stone sealant may be applied to the surface before installation. Porous limestone is likely to require multiple applications, see your sealant manufacturer's instructions for recommendations.
Before sealing, the mortar and tiles should be completely dry. Trapping moisture into the installation can cause moderate to severe aesthetic problems, such as ghosting, or a blotchy appearance. The installation will need at least 24-36 hours to cure and dry before the pre-grout sealing. This may take longer in high humidity. The tile should be completely clean as well; any dirt or mortar stains in the tile when sealed will remain there forever.
With any sealant or grout release, you will want to apply the product very thinly: more is rarely better. Thick applications of any product can dry unevenly, cause a gummy surface, or drip over the sides of the tile.
Not all sealants perform the same. Some only provide waterproofing, with little stain protection, while others may not perform well in frequently-wet areas. Follow the sealant manufacturer's individual instructions for application and cure time.
STEP 4. GROUTING
You should ensure that you have a grout that is appropriate for the installation (See Step 1.4). Mix as directed by the manufacturer.
Working in 2-3 square foot areas, spread the grout on the tile surface, then using the grout float move the grout at 45 degree angles to the grout lines. This ensures a smooth even grout joint.
Quickly clean up excess from the face of the tiles using a soft sponge and clean water. Avoid pulling the grout from the grout line by wiping at an angle to all grout lines.
Be sure to get the tile surface as clean as possible, to prevent grout staining.
Let cure for at least 24 hours, or longer depending on the grout manufacturer's recommendations or humidity level.
STEP 5. FINAL SEALING
As with the first sealing, ensure the installation is clean and dry before proceeding. The final coat(s) of sealant will also protect grout lines from staining. As before, follow the sealant manufacturer's instructions.
STEP 6. LOVE YOUR TILE!
Step 6.1 ART FOR GENERATIONS TO COME
With a little tender loving care, limestone tile installations will last for generations. To increase the service life and maintain an attractive appearance, a proper maintenance and cleaning schedule is recommended for all limestone tiles.
Limestone tiles should be regularly mopped with clean water and PH-neutral floor cleaners. Never use acids to clean limestone as it will cause damage. Visit our page on cleaning cement tile for more information. You may consider our new VillaWax, a floor cleaner initially developed for hardwood parquet flooring, which also renews a layer of protective natural wax with each cleaning.
In some cases, particularly with new construction, settling and shifting of the substrate may cause cracks to develop. Often this occurs along grout lines, but it may open a crack in the sealant layer. This will allow moisture to penetrate, particularly in wet areas such as bathrooms. When this occurs, be sure to repair and reseal as soon as possible. There are a number of stone repair kits on the market that will allow you to mix a color-matched epoxy to repair holes, cracks, or chips. Make sure to allow plenty of time to dry, before doing so.
Step 6.2 SHARE YOUR PROJECTS!
Let everyone see your vision brought to life, tag us on your favorite social platform with @villalagoontile or send your project photos and info to [email protected] for the chance to be featured on our site!
Download our printable Moroccan Limestone Installation Instructions (PDF).
- new
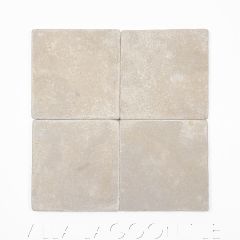 6” Square Beige Moroccan Limestone Honed and Tumbled$4.35 / Piece ($17.97 / square foot)
 - new
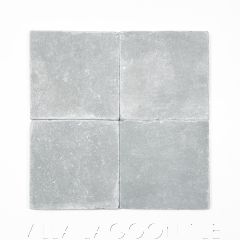 6” Square Light Gray Moroccan Limestone Honed and Tumbled$4.35 / Piece ($17.97 / square foot)
Shop our in-stock Moroccan Limestone now!